PowerPoint has easy ways to check and add accessibility features. For example, Check Accessibility and Selection/Reading Order are the two primary tools for making PowerPoint slides accessible. You don’t need to discard your old slides. Instead, you can simply change or add some features.
Learn how to resolve common challenges and include other tricks in PowerPoint:
- Check accessibility – This feature can flag several potential issues in your lecture slides. Not all flagged issues are 100% inaccessible (e.g., you might disagree with an issue about the reading order), but they are mostly accurate. Not all issues are caught by the automatic checker, and you will need to check for some accessibility issues (e.g., color contrast) manually.
- Check reading order – Selection/reading order impacts how a screen reader user reads your slide when reviewing it. Correct selection/reading order ensures that the screen reader will follow your presentation order. Imagine that’s the order that you’re going to present your slides. If inaccurate, the reading order will confuse the screen readers. For example, for complex slides with multiple text boxes, make sure the conclusion doesn’t appear first or the caption doesn’t follow the wrong graphic.
- Include alternative text (alt text) – Missing alt text visuals is another common barrier. Make sure you specify alt text to any important graphics and animations.
Check accessibility
Accessibility Checker is a built-in acccessibility checker in PowerPoint. It gives you an overview of potential accessibility issues on your slides. It is a great tool to help you identify most potential issues. However, it is not perfect. For example, it may flag some issues that are not inaccessible. Therefore, you should always double-check the flagged issues and make sure they are actually accessibile.
1. Launch the accessibility checker.
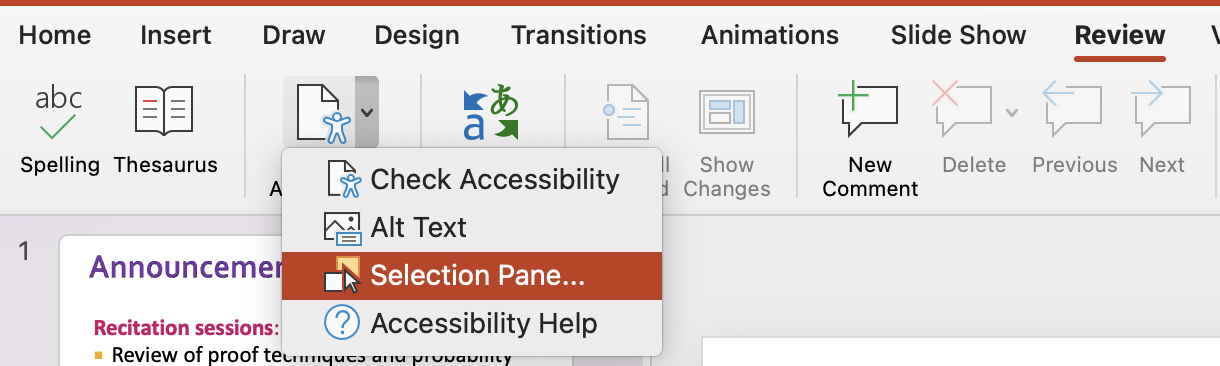
To launch the accessibility checker: select Review → Check Accessibility.

2. Check the accessibility panel.
You can check the accessibility panel on the right after clicking the button. Now you can see there are so many errors on our slide.
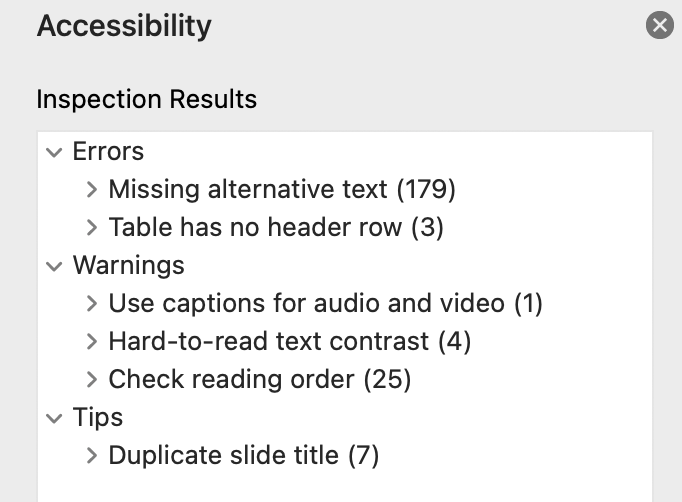
3. Check the details of each error and warnings.
When you click into an error, PowerPoint gives you recommendations on how to fix these issues. For example below, “Group 5” is missing alternative text. It turns out that we didn’t add alt text to the “Paul G. Allen School of Computer Science & Engineering” logo, which is an image.

Check reading order (selection order)
Reading order is also called selection order in some PowerPoint versions. The Reading Order impacts how a screen reader user reads your slide when reviewing it. Correct selection/reading order ensures that the screen reader will follow your presentation order. Imagine that’s the order that you’re going to present your slides. If inaccurate, the reading order will confuse the screen readers. For example, for complex slides with multiple text boxes, make sure the conclusion doesn’t appear first or the caption doesn’t follow the wrong graphic.
When we checked the accessibility panel, we could see that there are 25 errors in the reading order. Now it’s time to learn how to fix the reading order.
1. Launch the selection/reading order panel.
Next to the Review → Check Accessibility button, you can find the Selection Pane button.
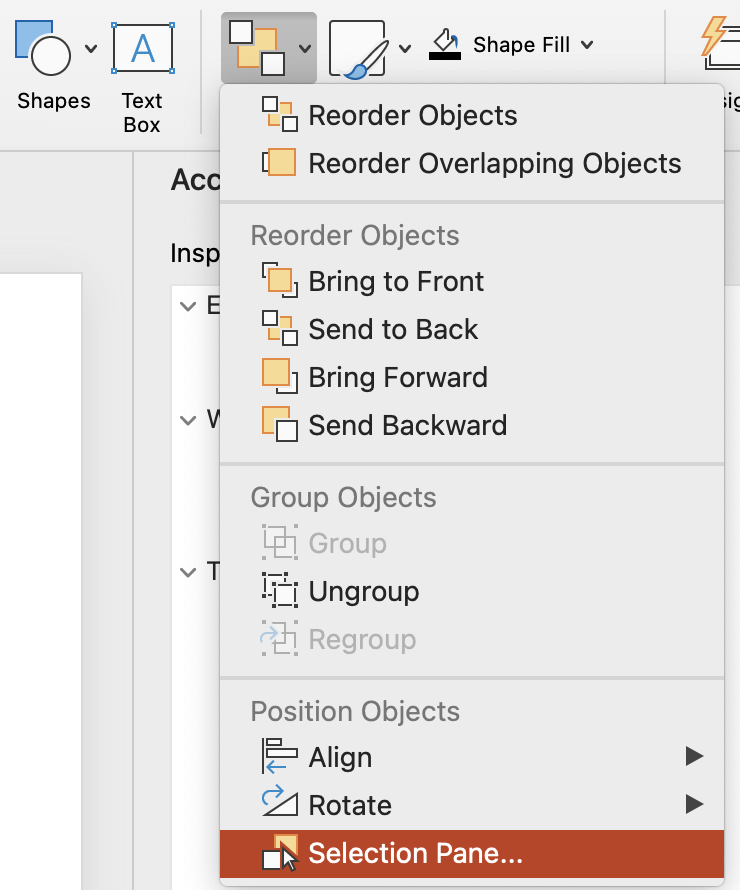
An alternative way to open this: Home → Arrange → Selection Pane
2. Preview the reading order on the selection pane.
We can find the Selection Pane on the right. It will include all the content that will be parsed by a screen reader. You can see the reading order of the slide on the Selection Pane.
The order goes from bottom to top on Mac; and from top to bottom on PC.
Below is an example of a slide and the reading order on the Selection Pane. The reading order is from bottom to top on Mac.

3. Drag and reorder the components.
To address the inaccurate order, drag the components to reorder. For example, the order in the slide above is actually inaccurate. We want to show Title 1 first and then Textbox 6. (i.e., show the title first, then the subtitles, and the author.)
You should also delete unnecessary components. For example, when we click “Textbox 6”, we actually see an empty box highlighted. It turns out it’s a text box that we forgot to remove when preparing the slide. A redundant textbox like this will likely confuse screen reader users.
4. Review the reading order.
When you finish addressing the reading order for all slides, make sure to go back to Review → Check Accessibility to see if any warnings are reported. If so, double-check whether you missed a few slides or if you intended your slides to be in a certain order. If the latter, you can safely ignore the warnings.